|
|
|
|
|
Home
|

|
Zigzag Illusion Cane |
| This tutorial will show how a series of different color values can be easily mixed with polymer clay and used to make a caned geometric design. The use of the different values of color enhances the ambiguity of the direction of the zig-zags in the design in addition to giving the design a dimensional quality. | |
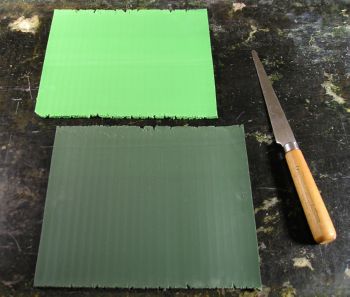
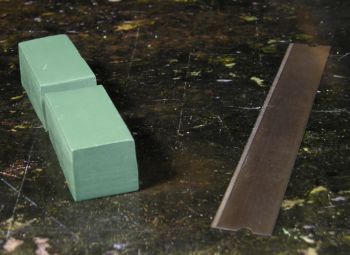
| Step 1 Condition two contrasting colors of clay that will blend together well. Choose one color to be light in value and the other dark. Using a pasta machine, form the clay into sheets the width of the pasta machine by about 7 inches long and rolled at the #1 thickness setting. Trim the sheets so that they are the same size. |
|
| Step 2 Place one sheet on top of the other and then cut diagonally through both sheets corner to corner. |
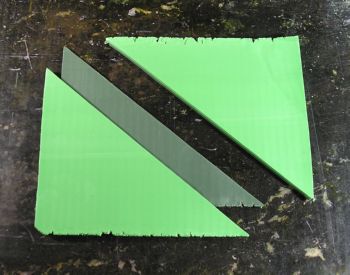
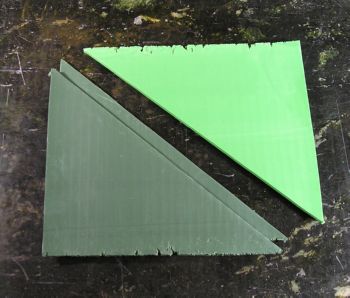
|
| Step 3 Reassemble so that the pieces of the same color are over top of each other. |
|
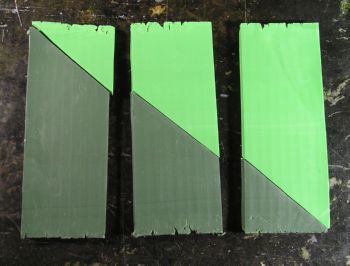
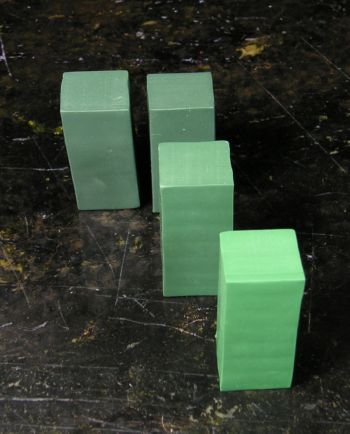
| Step 4 Rejoin the two pieces and then cut it as shown into three equal pieces. Condition each piece separately to obtain three shades of color. If you have an extruder, extrude right-angle triangular pieces like those obtained in Step 7 and continue from there. |
|
| Step 5 Stack sheets of the darkest color to make a square faced cane that can be cut in half to get two pieces each around 2 inches long. |
|
| Step 6 Prepare one 2 inch long square faced cane of the remaining two colors that are the same dimensions as the dark colored canes made in Step 5. |
|
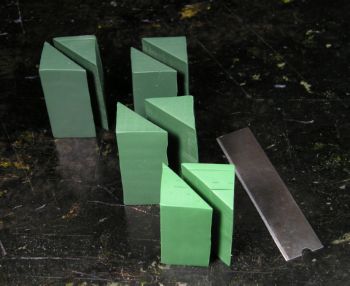
| Step 7 Stand each cane on its end and slice down through the length of the cane diagonally across the square face. |
|
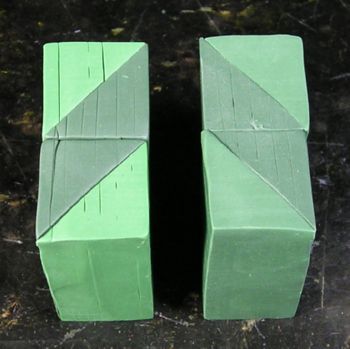
| Step 8 Reassemble the darkest colored pieces as shown. |
|
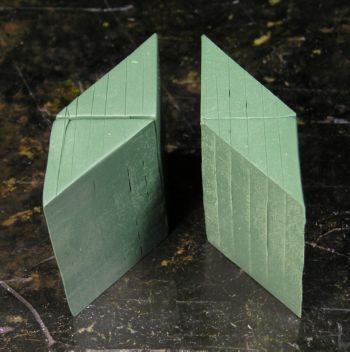
| Step 9 Add in the other colored pieces... |
|
| Step 10 and neatly assemble. The misalignment of the pieces at the bottom of the cane shown in the picture was fixed before cane reduction. |
|
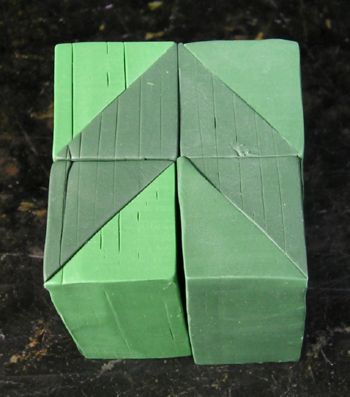
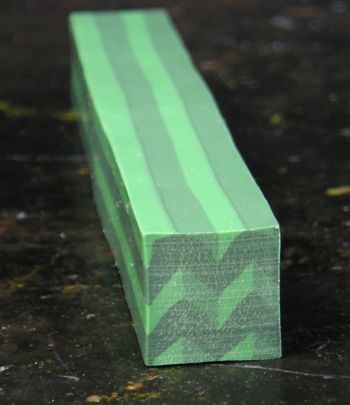
| Step 11 Carefully reduce the cane made in Step 10. If you wish the design to be smaller, reduce and cut the cane into four equal lengths, reassemble and reduce again. |
|
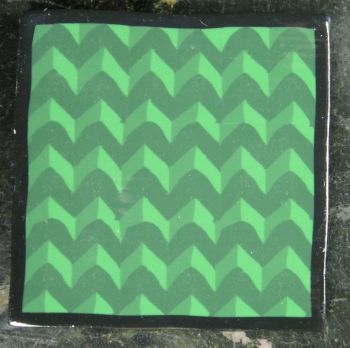
| Step 12 Tile the cane slices together to make the design. The effect works best when the lines are straight where the different colors touch, so construction and reduction of this cane must be done carefully. Even though the cane I made fit together suprisingly well, some of the triangle shapes got skewed on the corners during reduction. I ended up fixing up some of these parts on the slices I used in this picture so that the design would look better. |
|